Worm Bin – Which to Choose?
Install a worm bin for the absolutely best quality compost!
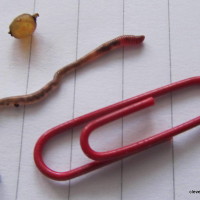
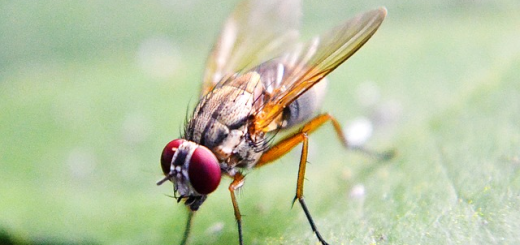
Baby worm. “we are not bait!”
Questions to ask and answer when choosing a worm bin.
- Are you going to make your own, or buy one?
- Are you going to keep it inside or outside?
- How much waste do you have to feed your worms?
- How will you plan to use your finished product?
As in all new ventures, planning is of prime importance. Installing a worm farm is no different. Answering the four points listed above helped to clarify my thoughts when choosing a worm bin.
The choice to build or buy will depend to some degree on your DIY skills. Building anything other than a basic single bin system may not be so easy if you do not have some experience. There are many different ways of putting a simple bin together though, from an old bath-tub, to a wooden box, to a couple of plastic bins that can nest one inside the other and that can be purchased from the DIY store. There are plenty of options that require little more than a drill and a couple of blocks to stand your bin on so that it can drain properly. I however am going to be realistic when choosing a worm bin and I intend to purchase one. First though, DIY.
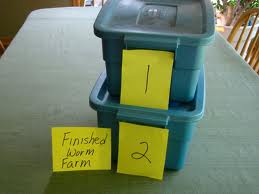
Choosing a worm bin to make yourself. Good old DIY!
A basic single bin with holes for draining any surplus liquid. Good for DIY.
A DIY worm farm. Courtesy of Healthy Urban Habitat of Australia
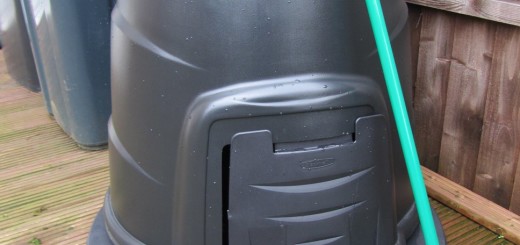
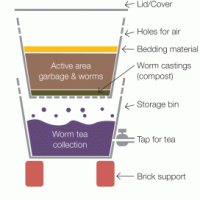
As already discussed, a single bin set-up can easily be made at home out of any old container such as a rubbish bin an old bath or, on a smaller scale, plastic or wooden boxes. The single bin needs to be opaque, as worms do not like light and it will need a well-fitting lid and some ventilation. This is vital, as poor ventilation results in a wet and sludgy mess and encourages the growth of smelly moulds. Proper drainage to remove the leachate that will be generated is also necessary. If you are siting your worm farm out-of-doors, you must be sure that no rain can get in. Rain drowns worms too! For simplicity, a couple of robust, opaque plastic boxes with tightly fitting lids, are great, as you can drill holes in one and nest it into the other, thus providing a drip-tray for catching any liquid. This will need to be emptied regularly, so fitting a tap where illustrated, will save you having to lift out your upper bin which is awkward and maybe distressing for your worms.
In a single bin, your finished compost (the castings) is harvested by lifting out your worms along with the top layer of partially digested material. You then remove the castings, put them to one side and re-lay the bin with bedding materials. Replace the worms along with the rest of the material that is still unprocessed, a little fresh food and water if necessary, and the vermicomposting cycle starts again. Choosing a worm bin that fits into this category is sensible under any circumstances. It is cheap, easy, (as long as you don’t go mad) and if you get fed up with the whole thing, you need not have any qualms about tossing it all out.

Multi-tiered vermicomposting bin.
Thanks for the permission to use this illustration from Auckland (NZ) City Council web-site createyourowneden.org.nz
A Stacking Bin, (Tiered Systems.)
Choosing a stacking bin style of worm farm provides you with extra trays, so you are able to avoid having to lift out the castings from under the creatures themselves – less messy and stressful. (for the worms, too). In practice you add another tray to your stack, adding some fresh nutrients and bedding. When the first tray has no more food, hopefully, your worms will migrate upwards into the new bin, leaving behind the castings they have thoughtfully provided. You then just lift the full try out (level 2), empty it, wash it and replace it at the top when you are ready. Compost worms are surface dwellers (as opposed to the usual species that live in our gardens), so as the food supply in the lowest bin is converted to compost, your stock will migrate up into the next bin, attracted by the goodies you have placed there. The leachate is easily removed using the tap in the collector tray. You will need to check your drainage frequently to ensure that there is no blockage preventing moisture from dripping through.
These stacking bin set-ups can be round or rectangular, with the rectangular style generally offering more area for living. This can be important, of course, as the amount of space available is one of the factors that dictate the speed and volume of reproduction. There are many versions available, either on Amazon or from other on-line retailers or, if you are lucky, your local garden centre.
A stacking bin is my personal choice at this time as the one I am considering is relatively well-priced, robust and there are good reports concerning its efficacy. I have read criticisms of plastic stacking containers in which the writers have maintained that they are less than adequate, that there can be problems with ventilation and humidity. I am willing to take a punt, though. I am also aware that these bins can get really heavy once they are full of worms and casts, so I want to be sure that I will be able to carry about should the need arise. I will let you know how I get on.
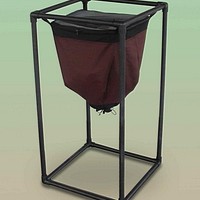
The Worm Inn. A great idea. Thanks to The Worm Dude for permission to use this image.
A Continuous Flow system
The continuous flow worm farm is where a single ‘cone-shaped’ container is used. These have been around for a few years now and the one I saw first was the Worm Inn which was developed in Canada by Bentley Christie of Red Worm Composting fame and which is now being sold by The Worm Dude, Jerry Gach. I tried to contact the UK website in the intention of perhaps buying one, but the web-site seems to be unattended with no products for sale in the on-line shop. The basic design of continuous flow seems to be well accepted and recommended by experienced users particularly in Canada and America. Bedding, ‘breakfast’ and worms are placed in the cone-shaped container which, in this case, is a bag made from a top-quality, breathable back-pack material. In the picture, you will see it is suspended from a frame, with the point at the bottom hanging downwards. The web-site which sells them suggests you could even hang them from the back of a door. (Good luck) Some moisture is added along with bedding, worms and food, the ‘cone’ is closed to keep out the light and that is it. You add extra food and mosture, when necessary, from the top and the processed compost accumulates and ‘packs down’ in the cone at the base of the container. Any fluid will automatically flow down to the lowest point, dripping through a small hole left in the bottom and into a waiting container. (You can see why it is called a continuous flow system now.) Extracting the compost is easily done, just by undoing the tie. According to Bentley Christie, the out-standing advantage of this system is that excess water drains away easily, making it almost impossible to drown your worms. Choosing one of these, makes retrieving your completed compost easy, and has the added advantage of not disrupting your worms during the process.
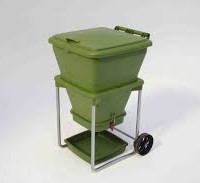
The Hungry Bin – looks excellent. Thanks to Ben Bell of lowimpact.co.nz for permission to use this image
Another version of the continuous flow system is the Hungry Bin as developed by Ben Bell in New Zealand. This, to me, looks good. It is rugged, easy to move about and, according to its own publicity, it can handle up to 2 kg (around 4 1/2 lbs of raw materials each day. There is an excellent blog reviewing this bin at The Compost Bin, a site which is very interesting and informative for those who are just starting out! The review of the blogger, known as Compostwoman, is very positive and to be honest, if I were able I would be choosing one of these. However, for me it is a bit expensive particularly just at this time. I have a tiny garden and limited kitchen waste. I already have a garden bin outside and I want to try Bokashi, too. I am keen to experience all three systems and to see how they all can work together to deal with my all of my organic waste materials – or at least most of them!
There are many different bins available and many ways of producing your own for little or no cost. Click here, to see how old baths can be used with great success. Choosing a worm bin is an important part of the setting-up process, but whichever one you decide on, you and your worms are going to be producing something really special that will make your garden ‘sing’.